






iPhone 4S Battery Replacement

Send this link via e-mail
|
Tweet |
|
Step 1 - Before You Start
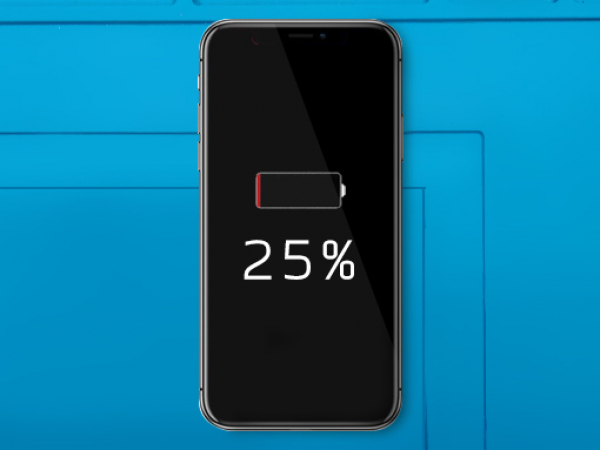
Before you start with the repair, the battery should be discharged below 25%.
If a Li-Ion battery is charged, it can explode and/or catch fire if punctured.
Caution:
If the battery is swollen, take adequate measures and precautions.
Do not heat your phone. You can use isopropyl alcohol around the edges of the back cover to weaken the adhesive.
Wear eye and hand protection when working with swollen batteries.
Step 2 - Pentalobe Screws
Back to top
Turn your iPhone off.
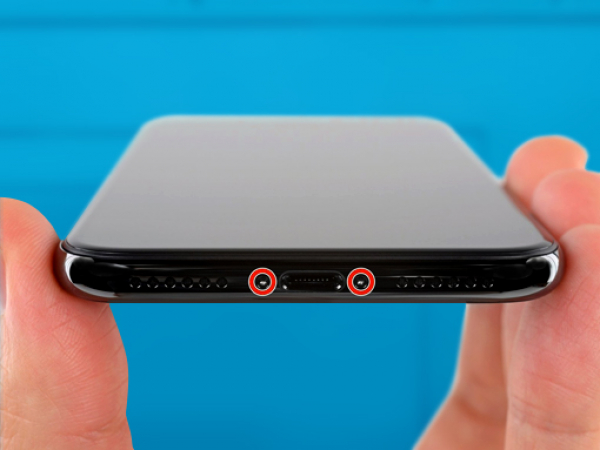
Remove two 6.9mm pentalobe screws sitting at the bottom of the device.
Note:
Opening the phone's display will jeopardize its waterproof features.
Make sure you have prepared replacement seals before you go on with the repair.
Otherwise, avoid exposure to liquid if you skip replaceing the seals when reassembling the phone.


Step 3 - Opening The Phone
Back to top
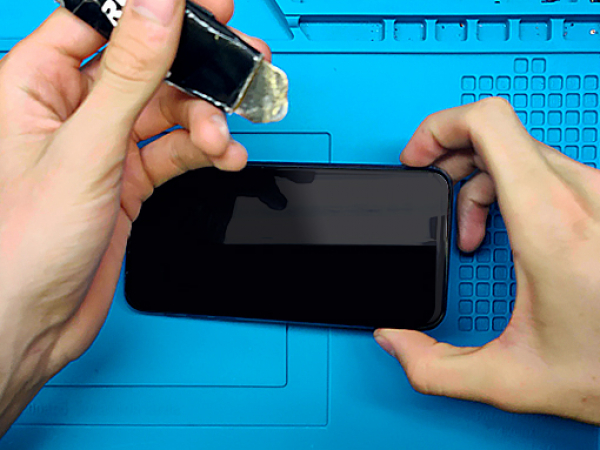
Move the spudger slowly along the edges starting from the bottom.
Twist the tool to increase the gap between the rear case and the display.
If you begin prying from the upper edge, you may damage the plastic clips which secure its LCD.
By separating the display assembly and the top edge of the device, the clips which hold the rear case and the display are disengaged.
To open the phone, pull the display up, and from the left, like a book's back cover.
It is still early to disengage the display completely; several ribbon cables still attach it to the phone's logic board.
Attention:
Avoid raising the display higher than 10º. The ribbon cables at the right edge of the phone still connect the LCD and the logic board.


Step 4 - Disconnect The Battery & LCD Display I
Back to top
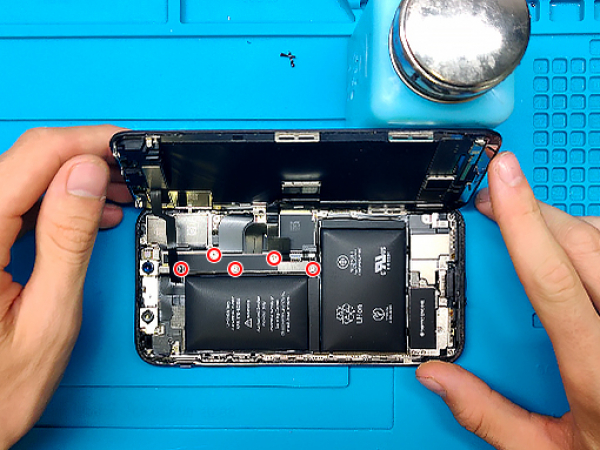
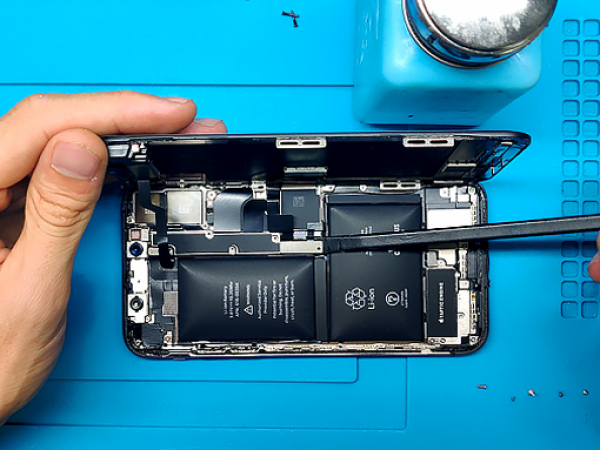
Remove five Y000 tri-point screws that secure the logic board connector bracket.
Three 1.1mm screws
One 3.1mm screw
One 3.7mm screw
Tip:
Remember where each screw comes from so you can put them back where they belong to avoid damaging the iPhone.


Step 5 - Disconnect The Battery & LCD Display II
Back to top
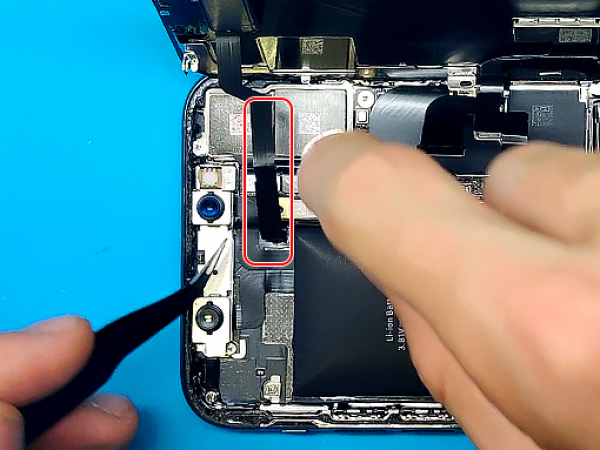
Remove the connector bracket gently.
The battery connector can be lifted out of its socket using the spurger's point.
The connector cable should be bent up a bit to prevent contact with the socket which can result in power in the phone.
Disconnect the front panel sensor array connector.
Pry the OLED panel cable connector using your fingernail or the spudger.
Use the point of a spudger to pry the digitizer cable connector up.
Caution:
When reconnecting the cables, press one end of the connector until it clicks back into place, do the same on the opposite end.
Avoid pressing down in the middle. A misaligned connector can cause the pins to bend.
Note:
If the screen is blank, white lines appear, or there is partial / complete loss of touch response after reassembly, disconnect and then carefully reconnect these two cables. Now secure them to be fully seated.


Step 6 - Removing The Display
Back to top
The sensor arrey cable on the front panel is lightly adhered in place.
Gently lift the cable until the adhesive separates.
The phone's display assembly should now be removed.


Step 7 - Removing The Battery
Back to top
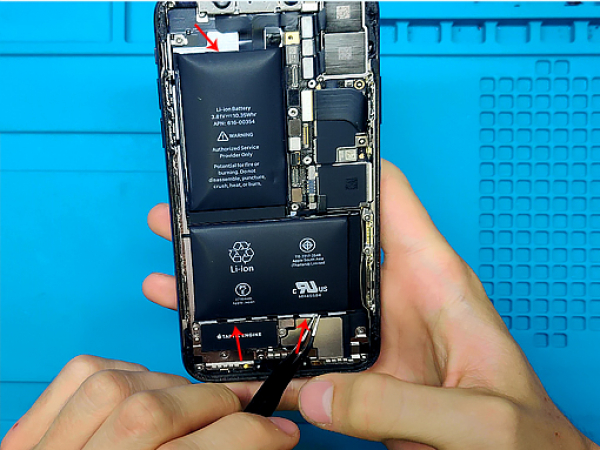
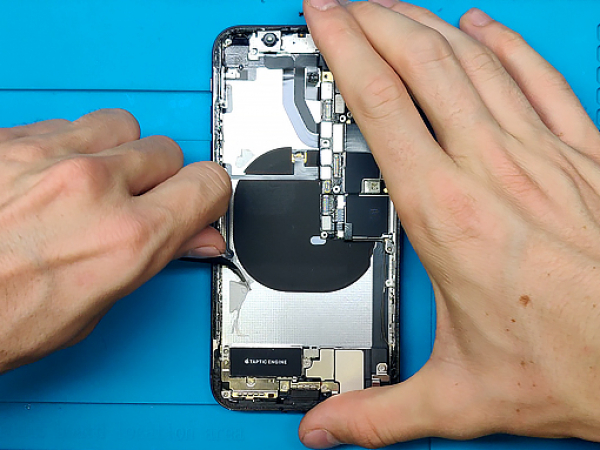
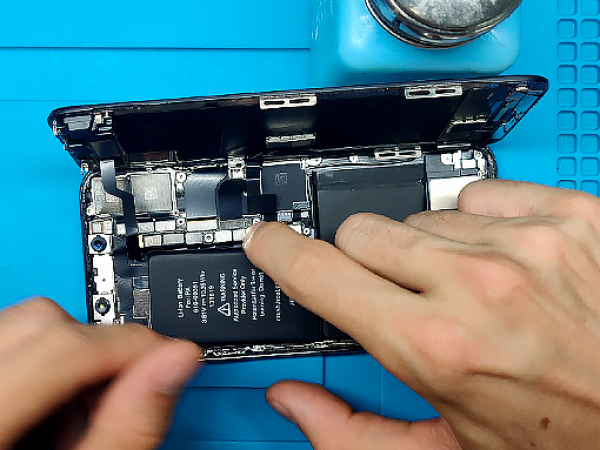
OEM iPhone batteries have adhesive strips underneath.
Use your tweezers to pull them out.
If you do not succeed, use a spudger to ''dig out" the battery.
Note:
Regular reapair procedure requires you to remove the haptic engine so you can clear the path to the adhesive strips.
We are performing the faster and easier way wich requires a proper sleight of hand ( fr- legerdemain - clarification: fine motor skills when used by performing artist)


Step 8 - The New Battery
Back to top
Once you successfuly removed the old battery, clean up any glue residue.
The new battery should have adhesive strips preinstalled, if not, use double sided self-adhesive tape.
Remove protective films and put the new battery in place.


Step 9 - Finish The Repair
Back to top
Reverse the steps 4 to 1 to connect the display and the battery
Power on your device and this repair is done!
If you prefer doing this repair yourself, our website offers the necessary parts and tools. Apart from the original and compatible batteries, we offer a wide range of iPhone 4S external batteries, as well as cheap chargers for your smartphone. However, if you want this repair to be handled by experts, find our offers in the iPhone 4S Repair category.